Automation in pipelines
Vault Radar stops new secrets ending up in the wrong hands, supporting developer workflows by scanning prior to code commits to repositories.
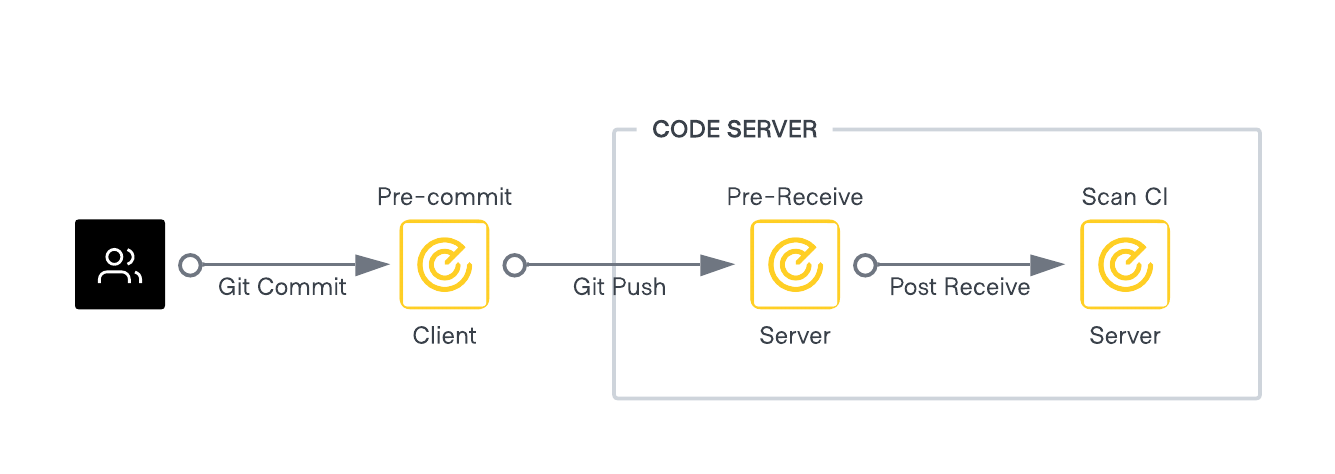
Pre-commit hook (client side)
Use pre-commit configuration as a first layer of protection for commits.
Prerequisites
- Vault Radar binary installed at client machine.
- A valid Vault Radar license.
- A pre-commit configuration file.
For manually setting up the pre-commit step, you can either edit the pre-commit step file within your repository at /.git/hooks/pre-commit with the following command:
vault-radar scan git pre-commit "$@" || { exit "$?"; }
Or you can run the following command in the repository folder where you want to install the pre-commit hook:
vault-radar install git pre-commit-hook
This automatically creates the /.git/hooks/pre-commit file with the command shown in the first example. Using the installation command adds the scan command to the existing pre-commit script leaving any existing configuration untouched.
You also have to create a pre-commit configuration file. Creating a global configuration file at your $HOME directory can simplify this task significantly. For creating the configuration file, follow the steps in the Vault Radar git configuration documentation.
Pre-receive hooks (git server)
Use pre-receive hooks to centrally enforce scanning of commits.
Prerequisites
- A valid Vault Radar License (setup as an environment variable from a secret, or a file path).
- Installed Vault Radar binary by committing it to a repository or adding in a chroot environment.
- A pre-receive script.
- A Vault Radar configuration file.
By default Vault Radar looks for the files in a /vault-radar folder. If necessary, override this by setting the VAULT_RADAR_CONFIG_PATH environment variable to the path of the configuration file. The Vault Radar configuration file must contain a list of all risk types to scan at the pre_receive_risk_allowlist list. If this list is empty, the scan exits with a non-zero status.
{
   "pre_receive_skip_activeness": true,
   "pre_receive_fail_severity":"medium",
   "pre_receive_risk_allowlist": [
       "jwt_token",
       "GitHub personal access token"
   ]
}
Review the Configuration overview section in the Vault Radar documentation for more information.
The following is an example of how to set up a pre-receive hook using vault-radar for GitHub Enterprise Server (GHES).
#!/bin/bash

# get the full path to `git`
git=$(which git)
export GIT=$git

# Get the directory of the script
# this is needed to properly pass the location of the license file and config file to vault-radar
script_dir=$(dirname "$(realpath "$0")")

# Set the HOME environment variable to the githook user's home directory
# on GHES hook env HOME var is not set
# without it vault-radar will fail
export HOME=/home/githook
export VAULT_RADAR_LICENSE_PATH=$script_dir/vault-radar.hclic
export VAULT_RADAR_CONFIG_PATH=$script_dir/config.json

exec $script_dir/vault-radar scan git pre-receive
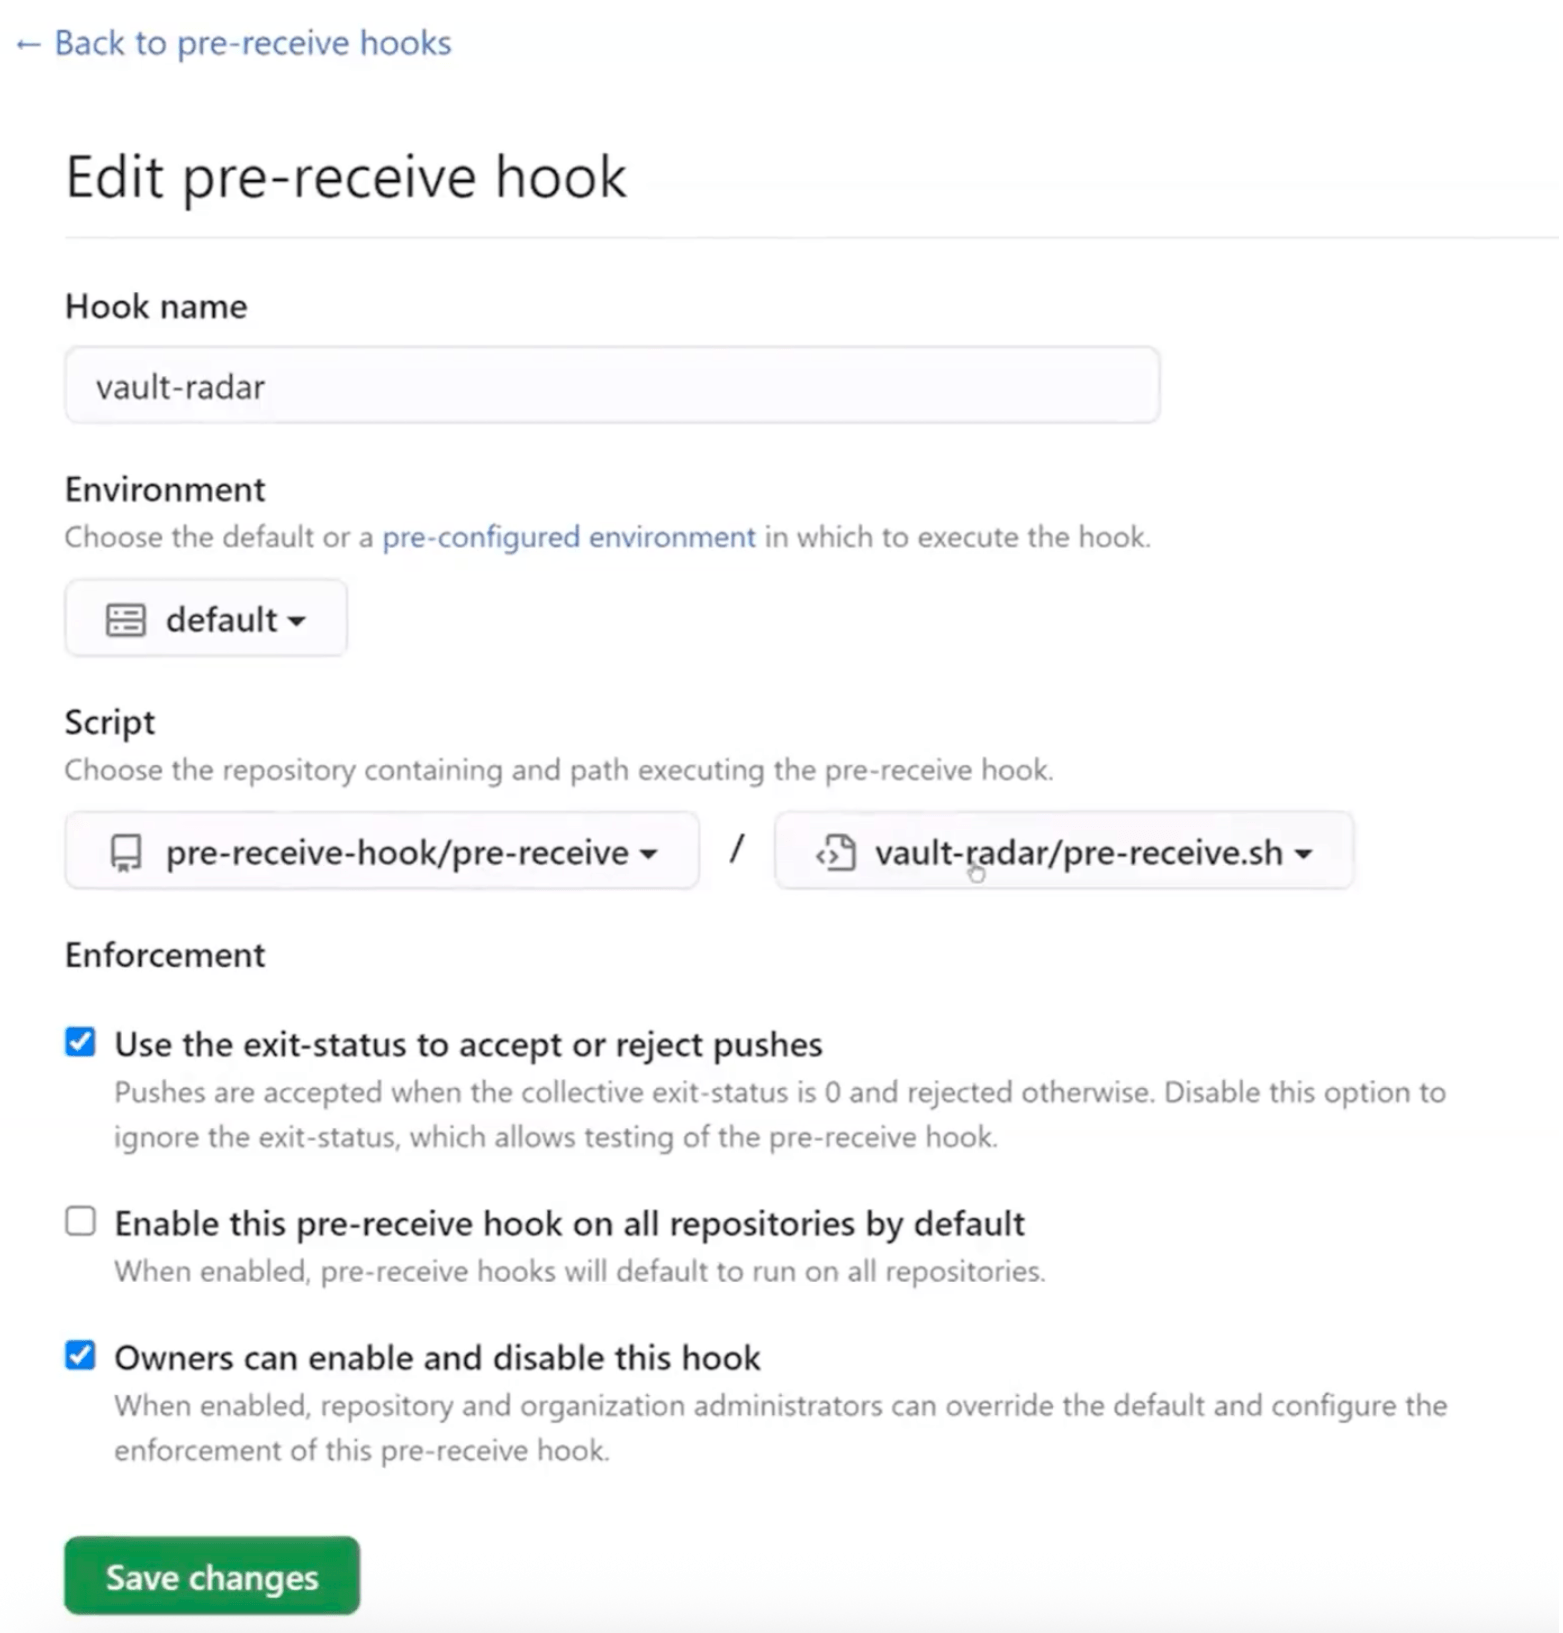
Once you create the repository with the files above, you will need to:
Go to your Enterprise settings > Hooks > Pre-receive hooks and click on Add pre-receive hook.
- Name the hook, e.g. vault-radar.
- Set the desired environment to execute when applicable.
- Choose the repository and the pre-receive script above.
- To enforce your script, select Use the exit-status to accept or reject pushes. Deselecting this option allows you to test the script while ignoring the exit-status value.
- To allow organization members with administrator or owner permissions to select whether they wish to enable or disable this pre-receive hook, select Administrators can enable and disable this hook.
Pull request scanning
Follow the Pull request check policies tutorial in the Vault Radar docs.
CI/CD scanning
Use the scan ci command to scan content in a continuous integration workflow.
Prerequisites
- Vault Radar binary file.
- An HCP project level service principal with the Vault Radar Agent role assigned.
Use the tip scan to the latest commit on a branch, this is often used in pipeline steps following a commit. This approach only scans the contents of the latest commit and does not do a full rescan of the repository.
Use the pr scan when reviewing a change. Similar to the tip scan, it does not perform a full re-scan of the repository, but instead supports options to scan all the commits of the specified pull request.
If the commits are very large (gigabytes of data) these commands could take additional time and require additional agent memory allocation in order to check out and scan the content. In the case of small to medium size commits, there should not be any need for improved agent hardware or additional computational power for Vault Radar scanning to be successful.
For a detailed example, please check the Example Vault Radar CI configurations in the docs.
Running Vault Radar CLI scan and meter commands
The scanning and metering commands are typically more comprehensive and scan all of the contents as well as the entire history of the resource. Similar to CI/CD scanning, the main bottleneck with the commands is the size of the scanned content.
Vault Radar does its best to efficiently scan contents but we are often at the mercy of the integration. Git resources, for example, are very efficient. We are able to compress the contents and scan only the incremental diffs making the memory burden generally low (for typical cases at least, if you know your commits again are unusually large this may not hold true). For resources like a Confluence Space, the integration does not provide a way to retrieve the contents efficiently. For every version of a page it must download and scan the whole page. Because of these differences it is important to have some understanding of the resources you intend to scan.
Scanning itself is not particularly CPU intensive. An increase of CPU resources could yield faster results, but we do not expect the improvements to be drastically significant. Additionally most of the commands are very network intensive with the exception of resources located on the host machine itself. Memory is generally the main constraint.
To help with scaling we provide this table describing considerations for the specific data source or resource.
| Resource | Scanned Entity | Notes | Metering |
|---|---|---|---|
| AWS Parameter Store (Beta) | Parameter entry | Typically small | No |
| AWS S3 (Beta) | S3 Object | S3 Object can be very large | No |
| Git repository | Cloned repository | Typically small | Yes |
| Confluence | A version of a Confluence page | Confluence pages can be very large | Yes |
| Docker image (Beta) | Docker image | Typically small | No |
| File or folder (Beta) | File or folder | The contents are on the host already | No |
| Jira | Jira issue | Typically small | Yes |
| Slack (Beta) | Slack message | Typically small | No |
| HCP Terraform (Beta) | Terraform configuration | Typically small | No |
CLI indexing commands
Vault Radar supports indexing AWS Parameter Store and Vault using the CLI. In both cases the CLI has to read the contents of each item in the data source.
Similar to scanning, the main consideration is the size of the largest entries in the data source. Vault entries by default can be up to 512 KiB and 4KB for AWS Parameter Store. Vault Radar creates the index as a file on the machine. The index is small, containing information about the location, a hash of the contents used as the index, and some metadata. The host machine must have enough memory to scan entries while constructing the index.