Create Kubernetes native secrets from HCP Vault Dedicated with VSO
The Vault Secrets Operator allows you to create native Kubernetes Secrets from static and dynamic secrets managed by Vault.
Challenge
Kubernetes secrets can are a static configuration object containing confidential information. They are typically created during the deployment of an application, and remain unchanged throughout the lifecycle of the application’s container. Kubernetes does not support secret rotation, leaving that responsibility to the development or operations team.
Solution
The Vault Secrets Operator takes a static or dynamic secret from Vault and creates a Kubernetes secret. With VSO, using Vault is transparent, which lets you avoid updating your applications or processes.
In this tutorial, you will set up:
- Your local environment to support Vault Dedicated.
- Start a Kubernetes cluster using minikube.
- Configure networking between Vault Dedicated and Kubernetes.
- Deploy the Vault Secrets Operator
- Create and read Kubernetes secrets managed by Vault Dedicated.
Prerequisites
- HCP Vault Dedicated dev tier or higher cluster available
- Vault
- kubectl
- Helm
- minikube installed and configured
- ngrok installed and configured with an auth token
This tutorial was tested against the following specific versions:
- HCP Vault Dedicated 1.15.4
- Vault CLI 1.15
- Kubectl 1.27.2
- Helm 3.11.2
- minikube 1.31
- Kubernetes 1.27.3
Lab setup
Vault setup
Launch the HCP Portal and login.
Click Vault in the left navigation pane.
In the Vault clusters pane, click vault-cluster.
Under Cluster URLs, click Public Cluster URL.
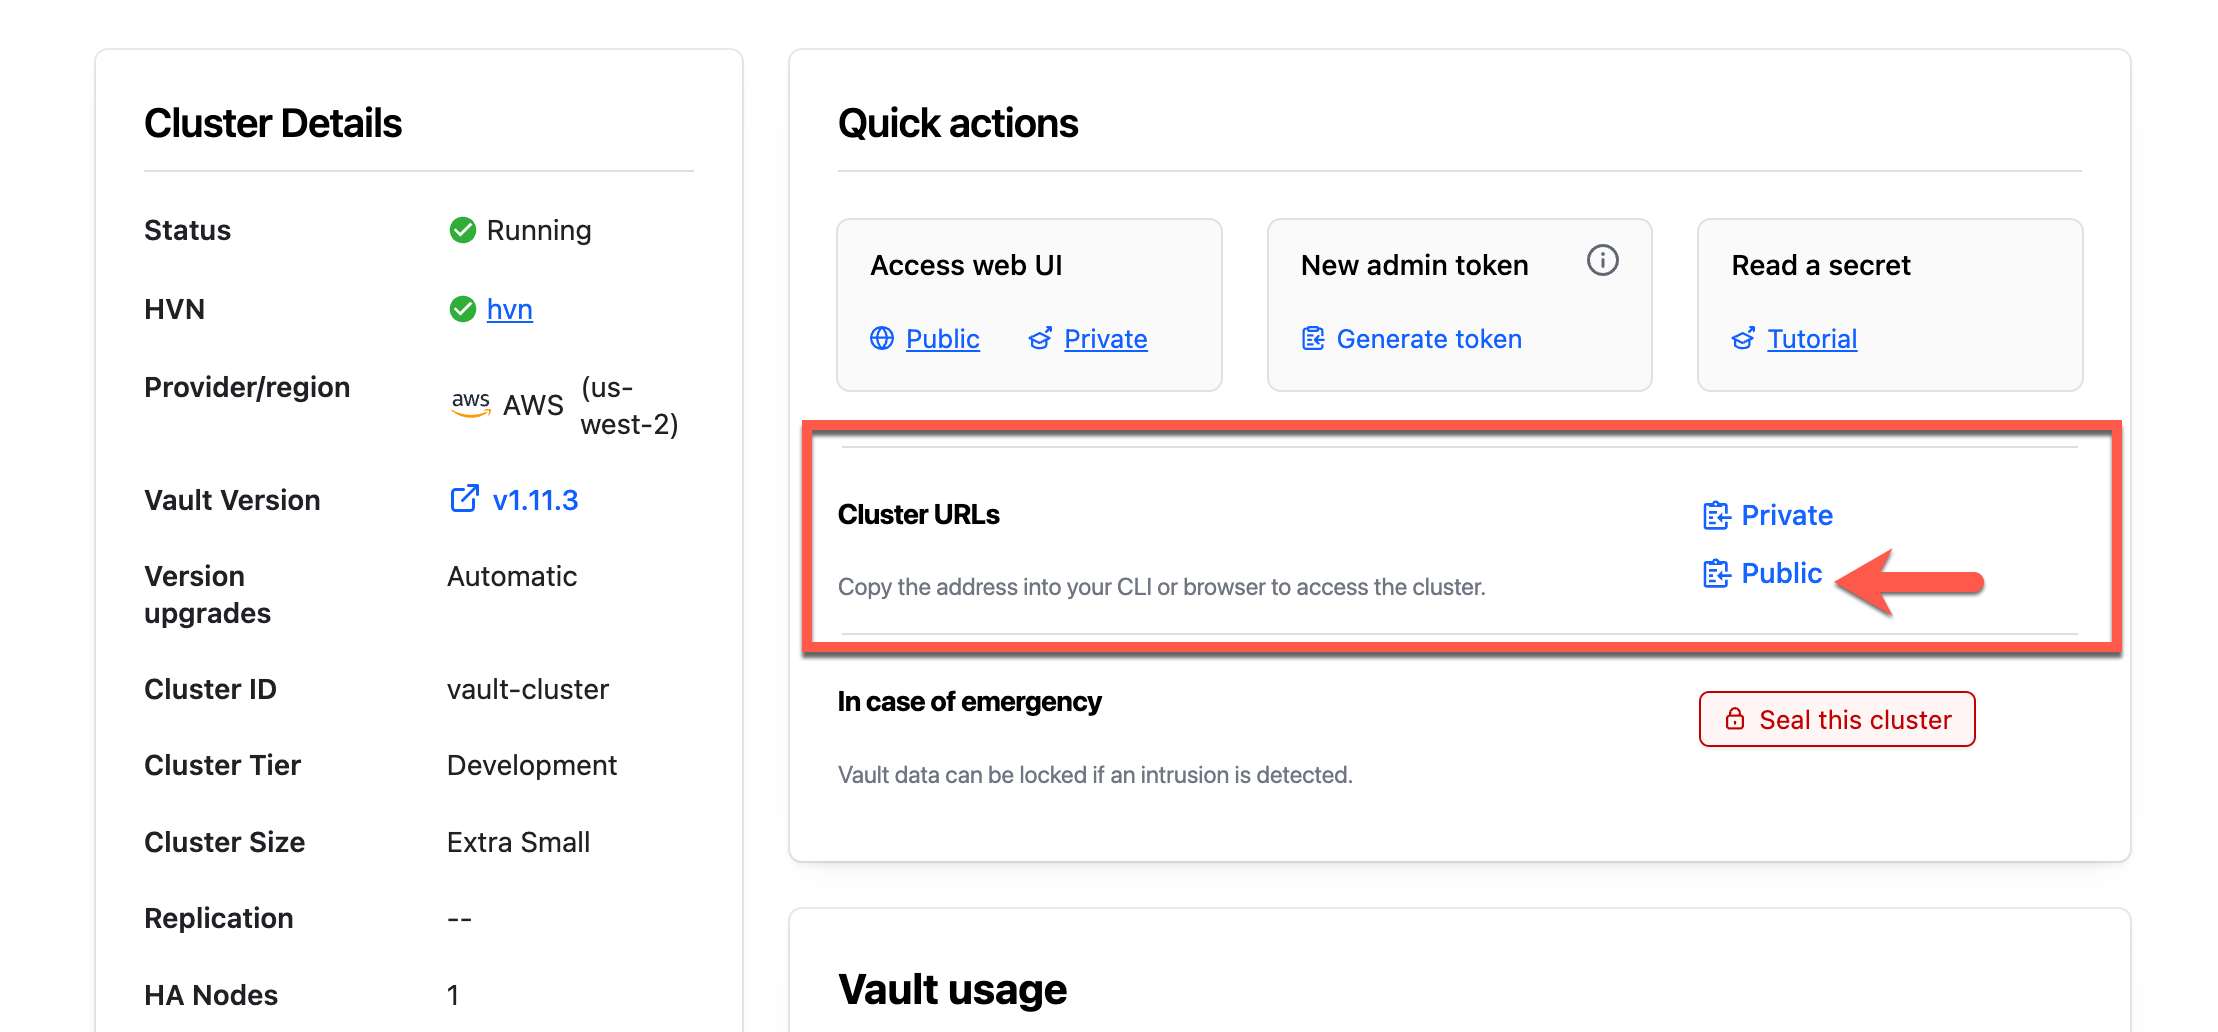
Open a new terminal and set the
VAULT_ADDRenvironment variable to the copied address.$ export VAULT_ADDR=<Public_Cluster_URL>Return to the Overview page and click Generate token.
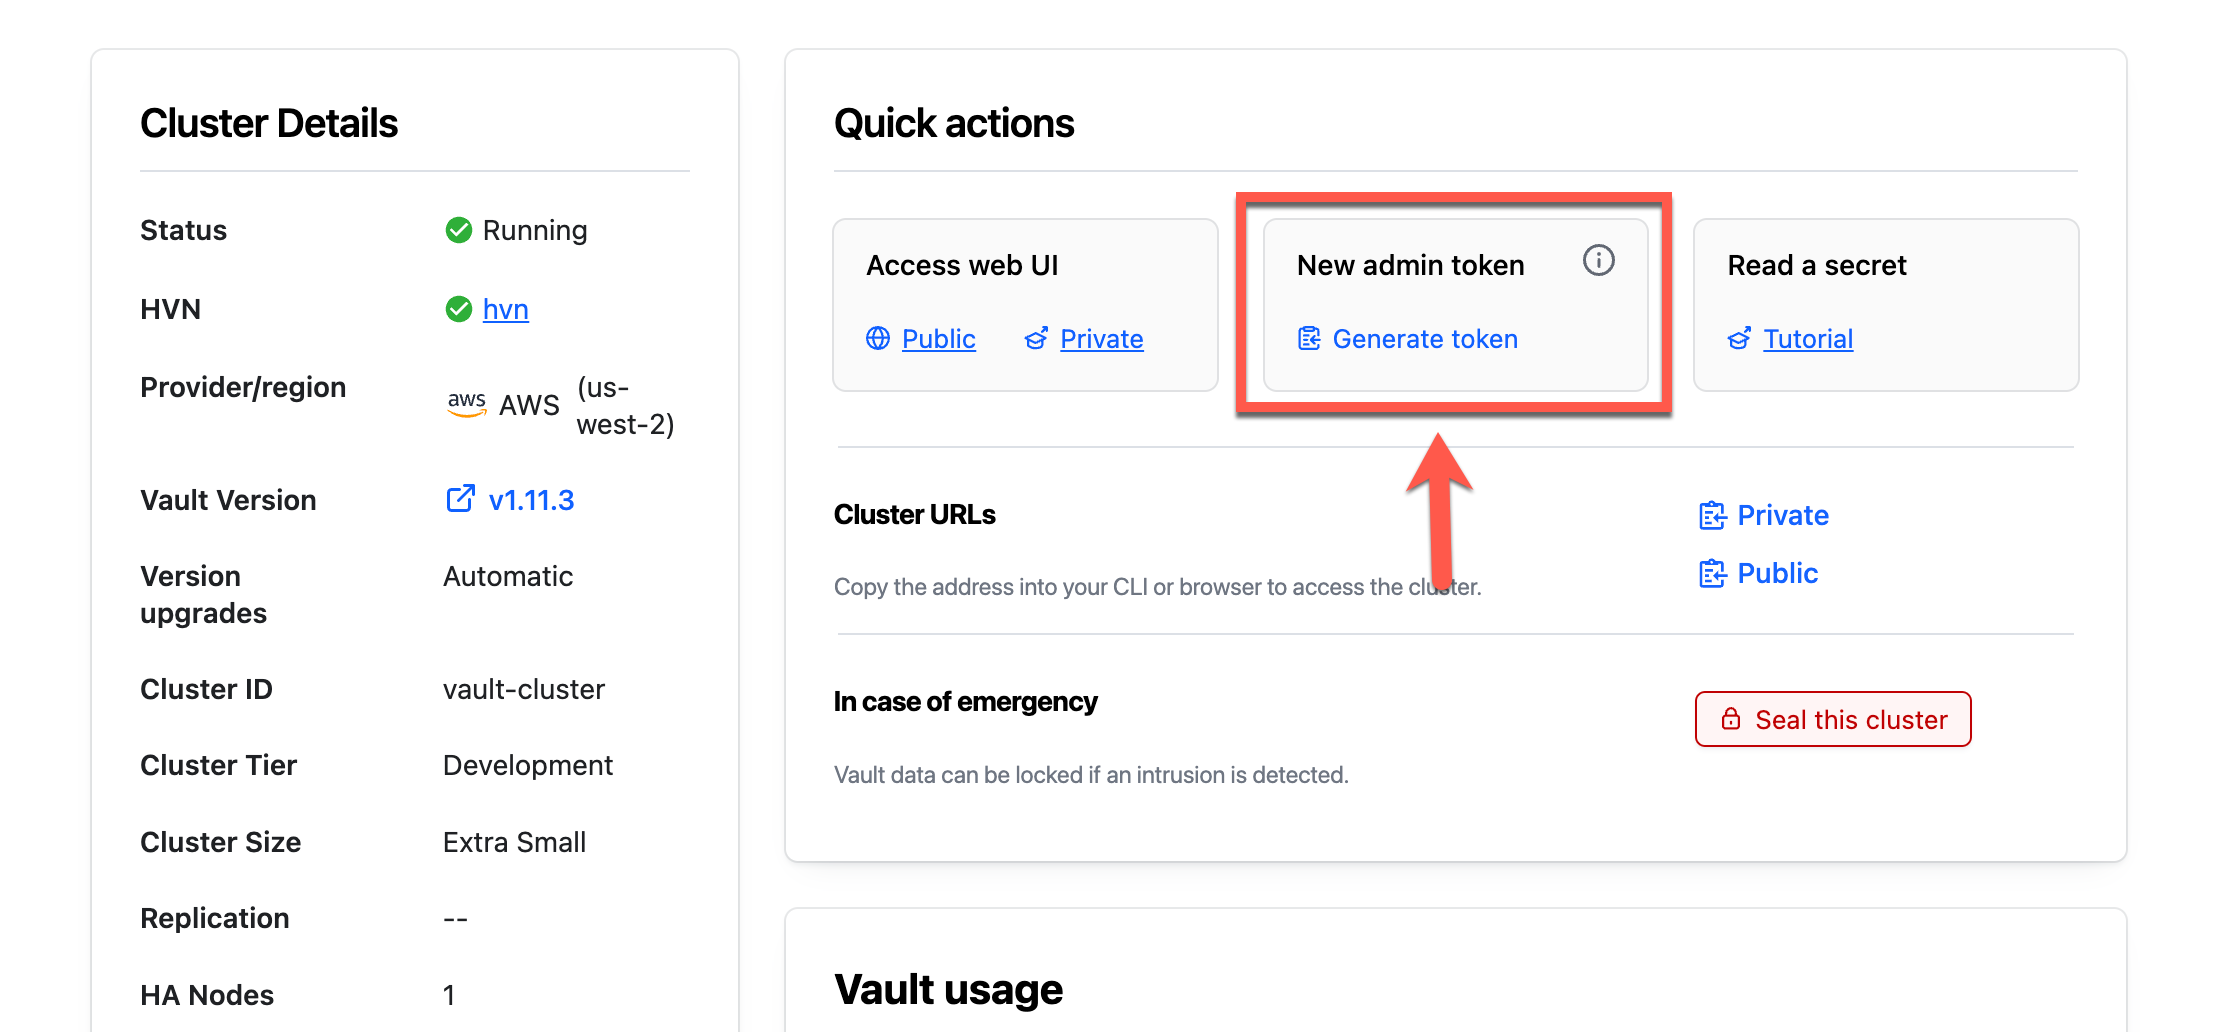
Within a few moments, a new token will be generated.
Copy the Admin Token.
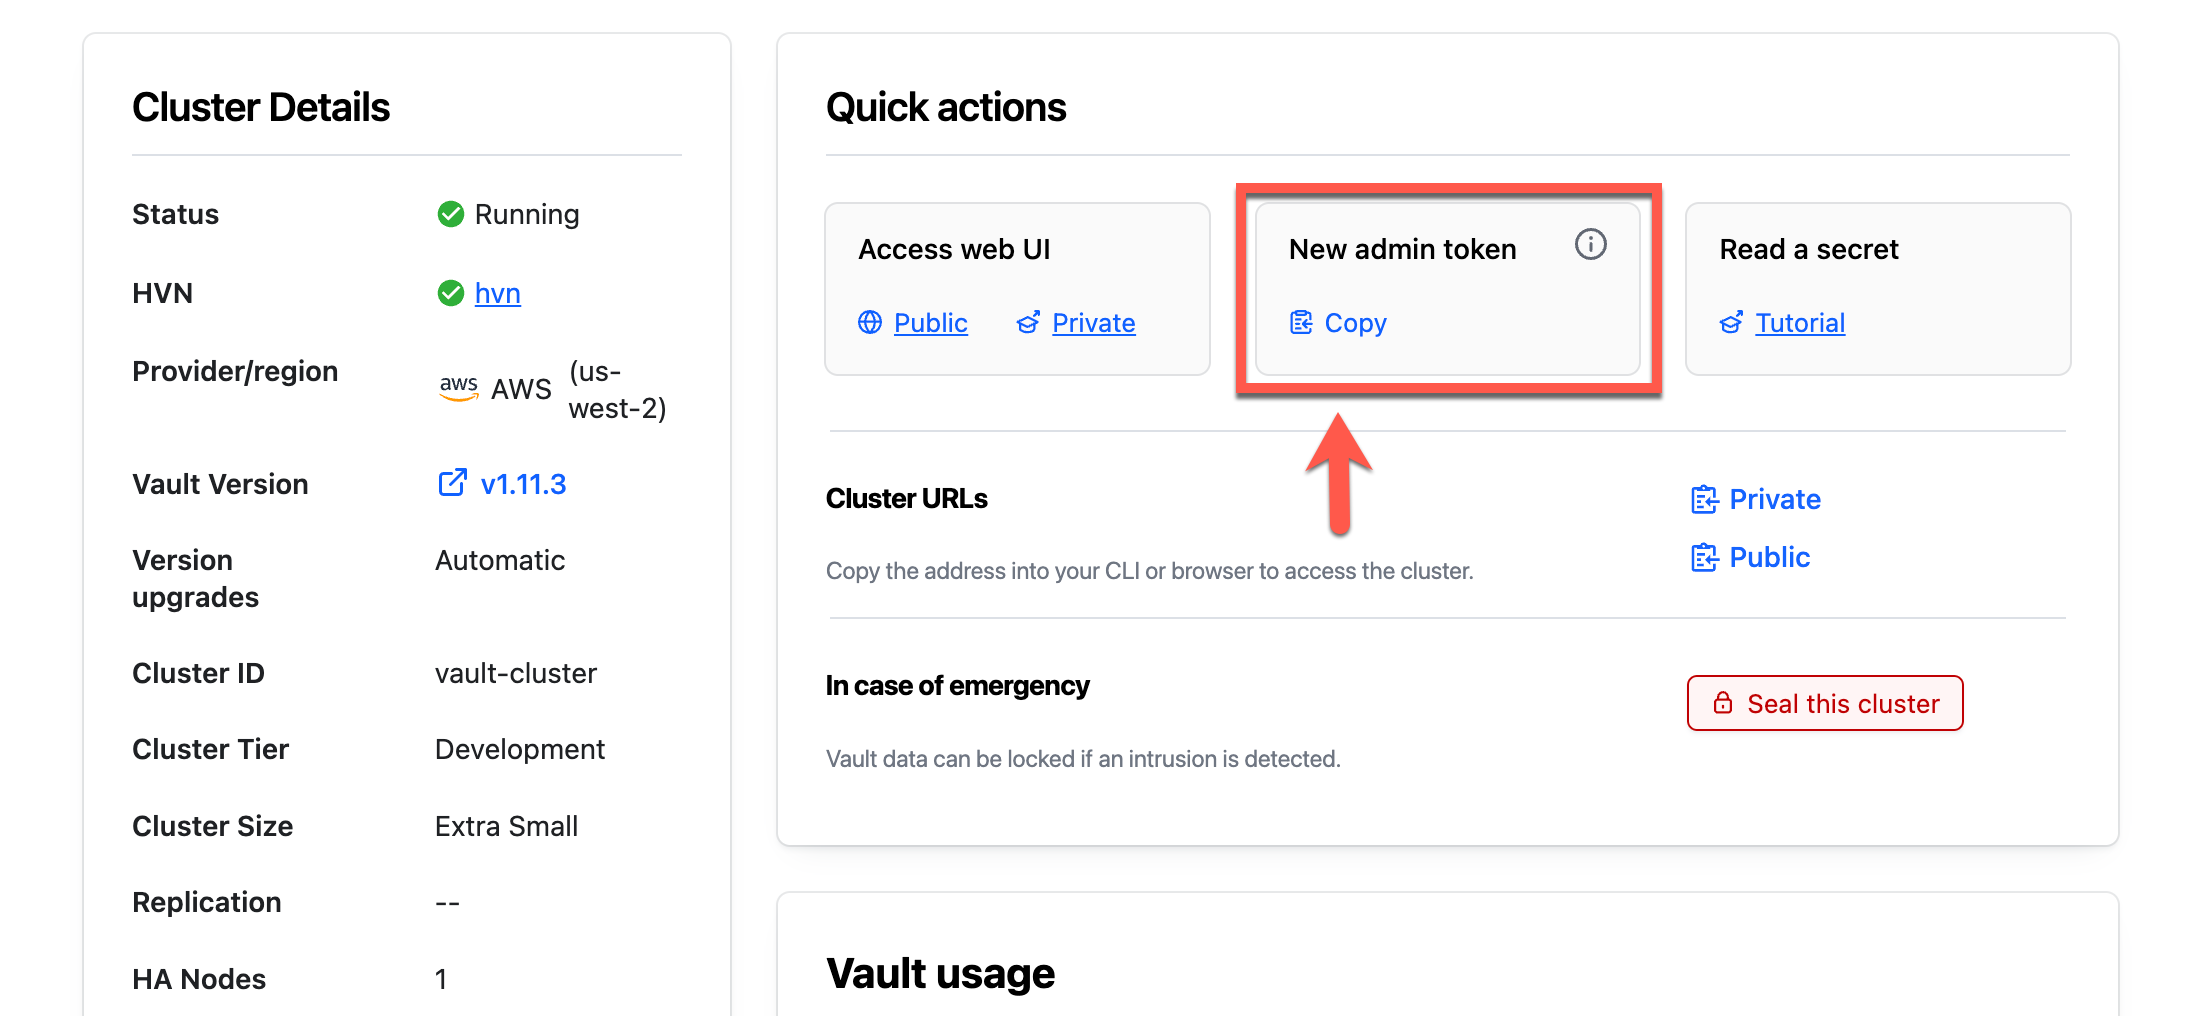
Return to the terminal and set the
VAULT_TOKENenvironment variable.$ export VAULT_TOKEN=<token>Set the
VAULT_NAMESPACEenvironment variable toadmin.$ export VAULT_NAMESPACE=adminThe
adminnamespace is the top-level namespace automatically created by HCP Vault. All CLI operations default to use the namespace defined in this environment variable.Enable the KV secret engine.
$ vault secrets enable -version=2 -path=secret kv

Success! Enabled the kv secrets engine at: secret/
Create a secret at path
secret/exampleapp/configwith ausernameandpassword.$ vault kv put secret/exampleapp/config username='jalbertson' password='bestpasswordever' ======== Secret Path ======== secret/data/exampleapp/config ======= Metadata ======= Key Value --- ----- created_time 2022-06-06T18:26:14.070155Z custom_metadata <nil> deletion_time n/a destroyed false version 1The Vault Dedicated server is ready.
Kubernetes setup
You will use minikube, a CLI tool that provisions and manages the lifecycle of single-node Kubernetes cluster, to set up a Kubernetes cluster on your system.
Start a Kubernetes cluster.
$ minikube start

😄  minikube v1.25.2 on Darwin 12.3
✨  Automatically selected the docker driver. Other choices: hyperkit, virtualbox, ssh
👍  Starting control plane node minikube in cluster minikube
🚜  Pulling base image ...
🔥  Creating docker container (CPUs=2, Memory=8100MB) ...
🐳  Preparing Kubernetes v1.23.3 on Docker 20.10.12 ...
    ▪ kubelet.housekeeping-interval=5m
    ▪ Generating certificates and keys ...
    ▪ Booting up control plane ...
    ▪ Configuring RBAC rules ...
🔎  Verifying Kubernetes components...
    ▪ Using image gcr.io/k8s-minikube/storage-provisioner:v5
🌟  Enabled addons: storage-provisioner
🏄  Done! kubectl is now configured to use "minikube" cluster and "default" namespace by default
The initialization process takes several minutes as it retrieves any necessary dependencies and executes various container images.
Verify the status of the Kubernetes cluster.
$ minikube status

minikube
type: Control Plane
host: Running
kubelet: Running
apiserver: Running
kubeconfig: Configured
The Kubernetes cluster is ready.
Configure Kubernetes
Create Vault service account
Create a Kubernetes service account named
vault-authwith a service account token. This token is used by Vault to authenticate with the Kubernetes API.$ kubectl create -f - <<EOF --- apiVersion: v1 kind: ServiceAccount metadata: name: vault-auth --- apiVersion: v1 kind: Secret metadata: name: vault-auth annotations: kubernetes.io/service-account.name: vault-auth type: kubernetes.io/service-account-token --- EOFExample output:
serviceaccount/vault-auth created
secret/vault-auth created
Create a role for the
vault-authservice account to permit access to the Kubernetes API.$ kubectl create -f - <<EOF apiVersion: rbac.authorization.k8s.io/v1 kind: ClusterRoleBinding metadata: name: role-tokenreview-binding roleRef: apiGroup: rbac.authorization.k8s.io kind: ClusterRole name: system:auth-delegator subjects: - kind: ServiceAccount name: vault-auth namespace: default EOFExample output:
clusterrolebinding.rbac.authorization.k8s.io/role-tokenreview-binding createdRetrieve the
vault-authsecret and store it as an environment variable.$ VAULTAUTH_SECRET=$(kubectl get secret vault-auth -o json | jq -r '.data') \ && echo $VAULTAUTH_SECRET{ "ca.crt": "LS0tLS1CRUdJTiBDRVJUSUZJQ0FURS0tLS0tCk1JSURC..<snip>..lwNGN6cmFpb0E9PQotLS0tLUVORCBDRVJUSUZJQ0FURS0tLS0tCg==", "namespace": "ZGVmYXVsdA==", "token": "ZXlKaGJHY2lPaUpTVXpJMU5pSXNJbXRwWkNJNkl..<snip>..TWR3T0kwRVlxcE0zZGJ1d3JMUW5vMjNhSnJWaU5SaEp3" }The secret includes the Kubernetes public key
ca.crtand thetokenas base64 encoded strings.Decode the ca.crt certificate and store it as an environment variable.
$ K8S_CA_CRT=$(echo $VAULTAUTH_SECRET | jq -r '."ca.crt"' | base64 -d)Decode the token and store it as an environment variable.
$ VAULTAUTH_TOKEN=$(echo $VAULTAUTH_SECRET | jq -r '.token' | base64 -d)You have collected the necessary information for the
vault-authservice account to configure the Kubernetes auth method.
Configure networking
In this tutorial, you will configure ngrok to expose the Kubernetes API to Vault Dedicated. For production workloads, this would typically be set up using a peering connection, transit gateway, or VPN. Refer to the HashiCorp Virtual Network documentation to learn more.
In another terminal, start a proxy to expose the Kubernetes API.
$ kubectl proxy --disable-filter=true

Request filter disabled, your proxy is vulnerable to XSRF attacks, please be cautious
Starting to serve on 127.0.0.1:8001
Leave this tab open with the proxy running.
In another terminal, start ngrok and create a tunnel to the proxy listening on port
8001.$ ngrok http --scheme=http 127.0.0.1:8001Example output:
ngrok                                                                                                                                                              (Ctrl+C to quit)

Session Status                online
Account                       username (Plan: Free)
Update                        update available (version 3.0.5, Ctrl-U to update)
Version                       3.1.1
Region                        United States (us)
Latency                       32.791235ms
Web Interface                 http://127.0.0.1:4040
Forwarding                    http://d12b-34-567-89-10.ngrok.io -> 127.0.0.1:8001

Connections                   ttl     opn     rt1     rt5     p50     p90
                              0       0       0.00    0.00    0.00    0.00
Copy the ngrok forwarding address.
Return to the terminal where you set the
VAULT_ADDRenvironment variable and set an environment variable for the ngrok forwarding address.$ export K8S_URL=<actual-address-from-ngrok>The Kubernetes API is now accessible to Vault Dedicated.
Configure Vault
Enable the Kubernetes auth method.
$ vault auth enable kubernetes

Success! Enabled kubernetes auth method at: kubernetes/
Configure the Kubernetes auth method to connect to the Kubernetes API using the
vault-authservice account token.$ vault write auth/kubernetes/config \ token_reviewer_jwt=$VAULTAUTH_TOKEN \ kubernetes_host=$K8S_URL \ kubernetes_ca_cert=$K8S_CA_CRTExample output:
Success! Data written to: auth/kubernetes/configCreate a Vault policy that permits read access to
secret/exampleapp/config$ vault policy write exampleapp-read - << EOF path "secret/data/exampleapp/config" { capabilities = ["read"] } EOFExample output:
Success! Uploaded policy: exampleapp-readCreate a role for the Kubernetes auth method and include the
exampleapp-readVault policy.$ vault write auth/kubernetes/role/exampleapp \ bound_service_account_names=vault-auth \ bound_service_account_namespaces=default \ policies=default,exampleapp-read \ ttl=1hExample output:
Success! Data written to: auth/kubernetes/role/exampleapp
Install the Vault Secrets Operator
Install and update the HashiCorp Helm repository.
$ helm repo add hashicorp https://helm.releases.hashicorp.com \
    && helm repo update
"hashicorp" already exists with the same configuration, skipping Hang tight while we grab the latest from your chart repositories... ...Successfully got an update from the "hashicorp" chart repository Update Complete. ⎈Happy Helming!⎈Install the Vault Secrets Operator.
$ helm install vault-secrets-operator hashicorp/vault-secrets-operator \
    --namespace vault-secrets-operator \
    --create-namespace \
Example output:
NAME: vault-secrets-operator
LAST DEPLOYED: Thu Jan 25 11:54:37 2024
NAMESPACE: vault-secrets-operator
STATUS: deployed
REVISION: 1
The Vault Secrets Operator has been installed.
Configure the Vault Secrets Operator
Create a connection to Vault Dedicated.
$ kubectl create -f - <<EOF
---
apiVersion: secrets.hashicorp.com/v1beta1
kind: VaultConnection
metadata:
  namespace: default
  name: vault-connection
spec:
  # address to the Vault server.
  address: $VAULT_ADDR
---
EOF
Verify the configuration.
$ kubectl describe vaultconnection.secrets.hashicorp.com/vault-connection

Name:         vault-connection
Namespace:    default
Labels:       <none>
Annotations:  <none>
API Version:  secrets.hashicorp.com/v1beta1
Kind:         VaultConnection
Metadata:
  Creation Timestamp:  2024-01-25T16:58:47Z
  Finalizers:
    vaultconnection.secrets.hashicorp.com/finalizer
  Generation:        1
  Resource Version:  3720
  UID:               60500026-9195-4e82-bb6b-9d255c1cd8dc
Spec:
  Address:          https://vault-cluster-public-vault-a53c80d0.66e2d051.z1.hashicorp.cloud:8200
  Skip TLS Verify:  false
Status:
  Valid:  true
Events:
  Type    Reason    Age   From             Message
  ----    ------    ----  ----             -------
  Normal  Accepted  107s  VaultConnection  VaultConnection accepted
Configure authentication for the Vault Secrets Operator controller.
$ kubectl create -f - <<EOF
---
apiVersion: secrets.hashicorp.com/v1beta1
kind: VaultAuth
metadata:
  name: vault-auth
spec:
  vaultConnectionRef: vault-connection
  method: kubernetes
  mount: kubernetes
  kubernetes:
    role: exampleapp
    serviceAccount: vault-auth
  namespace: "admin" #Vault Dedicated only
---
EOF
Example output:
vaultauth.secrets.hashicorp.com/vault-auth createdConfigure the Vault Secrets Operator to read from the
secretKV v2 mount at theexampleapp/configpath.$ kubectl create -f - <<EOF --- apiVersion: secrets.hashicorp.com/v1beta1 kind: VaultStaticSecret metadata: name: vault-static-secret spec: vaultAuthRef: vault-auth namespace: "admin" #Vault Dedicated only mount: secret type: kv-v2 path: exampleapp/config # version: 2 refreshAfter: 300s destination: create: true name: vso-handled --- EOFExample output:
vaultstaticsecret.secrets.hashicorp.com/vault-static-secret createdVerify the Kubernetes secret was created.
$ kubectl get secrets

NAME          TYPE                                  DATA   AGE
vault-auth    kubernetes.io/service-account-token   3      67m
vso-handled   Opaque                                3      23m
The secret
vso-handledwas created by the Vault Secrets Operator and named based on thenameparameter provided in theVaultStaticSecretconfig.Read the Kubernetes secret value and decode the base64 encoded strings.
$ kubectl get secret vso-handled -o json | jq ".data | map_values(@base64d)"

{
  "_raw": "{\"data\":{\"password\":\"bestpasswordever\",\"username\":\"jalbertson\"},\"metadata\":{\"created_time\":\"2024-01-25T15:48:31.871429498Z\",\"custom_metadata\":null,\"deletion_time\":\"\",\"destroyed\":false,\"version\":1}}",
  "password": "bestpasswordever",
  "username": "jalbertson"
}
Applications and users can now read the secret natively in Kubernetes such as mounting a volume or using an environment variable.
Clean up
Delete any Vault Dedicated clusters created that will not be used after completing the tutorial.
Stop minikube.
$ minikube stop(Optional) Delete the minikube instance.
$ minikube deleteReturn to the terminal running ngrok and type
ctrl-cto stop ngrok.Return to the terminal running the Kubernetes proxy and type
ctrl-cto stop the proxy.
Additional Resources
- Vault Secrets Operator with HCP Vault tutorial
- Vault Secrets Operator documentation